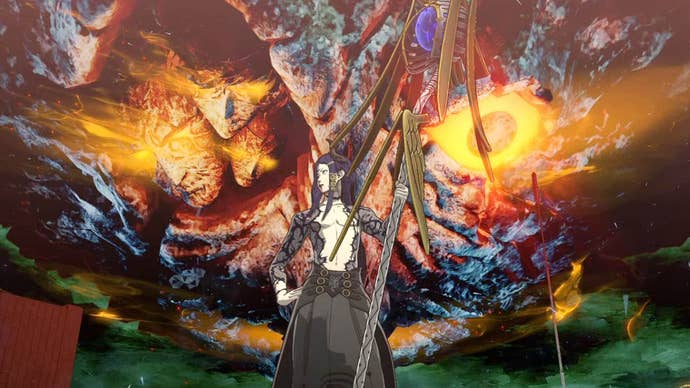
How to complete the Regalith Grand Cathedral dungeon.
Remember -you have a deadline on your calendar to complete this dungeonso don’t get too complacent.
Here’s ourMetaphor: ReFantazio Regalith Grand Cathedral dungeon walkthroughon ‘Normal’ mode.

After a brief conversation you’ll agree to helping find her friend further inside.
Once this conversation is over you’ll have unlocked the ‘A Friend In Need’ request.
Now head back to the point where you entered this room and through the door directly opposite you here.

More Watchdog Hundos will be up here.
Head through the door and it will bring you out into the first large room of the dungeon.
Don’t bother with attacking them, they shouldn’t wake up.

Collect the key and head back outside the room.
With your back to the sleeping guard head to the left to findGreat Fairy Dustamong some corpses.
Interact with the door to unlock it and head inside to free the hostages.

Unfortunately, you’ll find the Paripus Woman’s friend among the dead.
This completes the ‘A Friend in Need’ request which rewards you with 5,000 Reeve.
you could interact with the Mirage Cat at any point you find it during any dungeon.

you could pet it to secure your progress, visit Akademia or return to the entrance of the dungeon.
They’re really strong and not worth the effort really.
From the point you leave the stairs look for the rubble pile on your left.

Collect the item here to obtainRusted Armour.
The way we’re taking you will help you sneak past the pack of enemies on the ground.
Then, exit the Magla Hollow and head to your right towards the Treasure Chest.

you’re free to’t open this yet though as you need the Treasure Chest Key.
Deal with them and follow the hall around to the left.
Here, you’ll come to a large statue in the middle of the room.

There’s also someAilment Absolutionto the left of the main door too.
Smash the barrels to reveal a small opening in the wall.
Head in here to collect theMundane Threadsfrom the bed, then head back to the Treasure Chest.

Then head back out the door, and continue following the path to the right.
This creates another pathway back to the nearby Magla Hollow.
As you did with the other one, focus on destroying it to stop it spawning enemies.

Once you see the Blue Elementa again though you’re free to attack this as before.
Keep heading to the right here until you find aNeon Mushroomon the corner of a flowerbed.
From here, face the statue you passed earlier and head into the room to the left.

In here smash the barrels on the floor to collect someExpensive Medicine.
Again, you’re free to engage this enemy but we found it best to avoid them.
In here you’ll find someAilment Absolutionand a traumatised soldier sitting at the table.

Speak to them and they’ll give you theAltar Chamber Key.
Deal with the enemies in this room, which is far easier to do if you stun them first.
Then, smash all of the barrels around the room to collectInvincible Noodlesand aRobust Remedy.

Engage them in a fight where you’ll face a Sword Captain Malmorta and a Bow Captain Malmorta.
Then follow the path around until it brings you to another large enemy in a rather small space.
Between the barrels is a chest, open it to collect theSilver Spathaweapon.

Be careful with that last one though, an enemy is waiting to ambush you behind a stack here.
Do so and you should find a chest on your left - open this to collect theMoonlight Maceweapon.
You should find another place to drop down here - do this to get to the lower area.

Smash the barrels and collect thePurified Teacakeitem this reveals.
The Blue Elementa is also here.
Now head back the way you came to get back up to the solid walkway.

When you’re ready and your team has healed, head through the door next to the cat.
flush the Feral Hundos then continue through the large door between the two statues in this room.
This will take you to the Reception Chamber.

Be careful though, one of the statues is a Gargoz that will come to life and attack you.
They will not take damage from any basic weaponry attacks, so stick to elemental ones.
Once you’re ready, head out of this room and follow the path around to the left.

Climb the stairs here then continue through the large triangle doorway at the top.
Deal with them both and collect some more Chipped White Porcelain.
Yes, more exploring awaits.

Head back out of this room and to the left, you should find a ladder here.
Collect theSuperior Mundane Threadsat the bottom of it and then climb up to the next level.
At the top you’ll get your first look at the Crystal.

From here, head into the small room on your right with a single guard in it.
Take them down and collect theRobust Remedynext to them before heading back to the top of the ladder.
From the top of the ladder head straight and through the triangle doorway.

Here, another Gargoz and more guard enemies await.
As earlier, deal with the guards then press forwards around to the left.
scrub the enemies out and bring up the chest in here to collect somePurity Gloves.

You should be able to find aNeon Mushroomon the edge of a flowerbed here.
Of course, there are more soliders here, so deal with them first.
Go in here to encounter the Blue Elementa if you wish.

Up here, head around to the right and through the triangle door here.
At the bottom of the stairs here you should find that there’s another Magla Hollow on your left.
Enter here to secure your progress and return to Grand Trad if you gotta.

Exit the Magla Hollow when you’re ready and head forward then down the stairs to the left.
(Ignore the set leading upwards, the door here is locked for now.)
Climb across to the other side and a Treasure Chest containing theExorcist’s Cassockis on your left.

Now, retrace your steps until you’re back in the room where you moved the statue.
Once you’ve cleared out the enemies blocking your path you and you’ll destroy the Crystal - hurray!
Visit More’s cat just beside it to store your progress before moving on.

Once you’ve done this, then head through the door to the elevator.
Remember the Whiteclad Soldier from earlier?
Once you’ve gotten past this interaction continue following the path forwards through the next set of doors.

Also, do some supply shopping if you’re able to.
At the top you’ll find the Royal Sceptre Chamber - that’s now empty thanks to Zorba.
When you feel ready to, head inside the door next to More’s cat to face Zorba.

Don’t let the zombies become too much or they can easily overpower you.
We’ve got a separate page showing youhow to beat Zorbaif you need more helpful tips.