Fight the One-Winged Angel across worlds.
It’s a truly epic showdown that doesn’t just span multiple phases but multiple worlds.
Whereas Jenova was technically one boss with multiple phases, the Sephiroth fight features multiple bosses and phases.

At the very least, your HP and MP will recover during a few checkpoints.
That means you don’t have to start all over again should you fall to the One-Winged Angel.
Still, this will be a tricky battle if you’re not prepared.

It goes without saying that this final boss featuresspoilers!
You should have also bought any supplies and unlocked any upgrades you need before fighting Jenova.
That means you’re free to afford to give your highest-level Healing Materia to other party members.

That’s right, through a convergence of worlds, Cloud and Zack will fight together!
As another Buster Sword-wielding SOLDIER, you might assume Zack fights very much like Cloud.
However, he has a different special ability.

By pressing Triangle, he’ll hold his sword up and charge up a gauge.
This can go from Level 1 to Level 3, each level unlocking new abilities.
If you do get hit by this, immediately switch to the other party member.

High Braver is the ability you want as it gives you a few quicktime prompts during the attack.
This extends the combo to deal even more damage.
As Cloud and Zack alternate attacks, they’ll also have enough Synergy points to useSynergy AbilitySOLDIER’s Honor.

Save this for when you’ve staggered Sephiroth and you should make quick work of him.
Of course, that’s just the warm-up, and unfortunately Cloud and Zack’s reunion is short-lived.
He also has attacks that come at you from the ground.

Interred Horror causes pockets of the ground surrounding you to glow with dark magic.
You have just a few frames to get out of the way before they emit a blast.
Avoid these before attempting to attack Sephiroth Reborn’s body.
If you’ve saved up ATB from the previous phase, spend these on Braver.
Swarm targets you with single blasts that will interrupt you.
It’s futile trying to attack when this is happening.

If you’ve managed to charge up a Limit Break, you’ll get through this phase even quicker.
Its most powerful attack is the iconic Gigaflare, which will deal damage to everyone.
If that connects, Bahamut follows up with Celestial Slash as a one-two combo.

It also has charging attacks that can cover a lot of ground, including Galewind Slash and Luminous Dive.
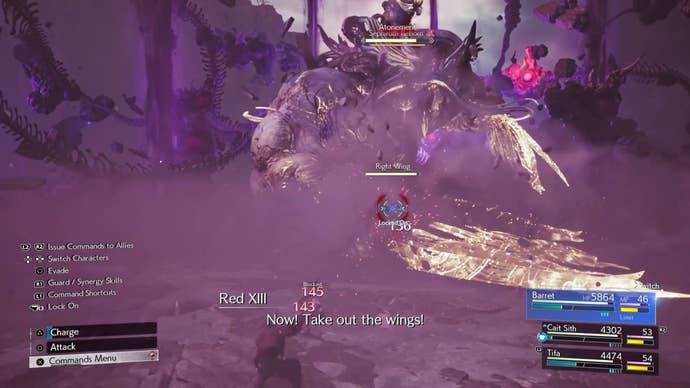
Sephiroth will use Atonement, pounding the ground with his right wing to send your party members reeling.
Annoyingly, Sephiroth Reborn will then use Blessing of Calamity to make another Bahamut Arisen Whisper.
This is your chance!
Sephiroth will take a while to do this and both of his wings will be left exposed to attack.
Naturally, focus on crippling the wing that you dealt damage to previously before moving onto the next one.

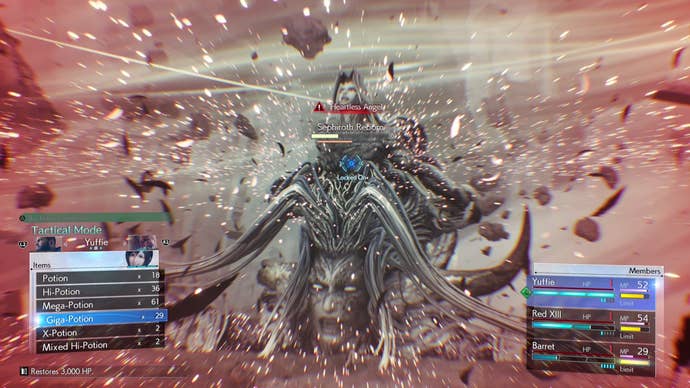
Anyway, guess who turns up as well: Sephiroth Reborn.
That means you might be able to get a quick stagger early on to make this phase easier.
In this phase you have to deal with familiar attacks like Apocalyptic Fire and Zanshin.

However, you also have what seems to be indirect support from Aerith.
In the centre of the area is the flower bed from the church in Sector 5 slums.
Occasionally you will see a faint dome glowing over it.

Magic is going to be vital in this phase.
That, however, requires parsing what colour represents which element.
All the while, you also need to avoid the elemental-based attacks those wings will unleash on you.

His attacks are similar to Cloud and Zack’s solo fight phases.
If you have ATB in reserve, then have everyone immediately heal with magic or a Giga-Potion.
This is your cue to just throw everything at him.
Once defeated Sephiroth Reborn will become Sephioth once more, this time in Cloud’s dimension.
This time you won’t fight alone because who reappears at your side but Aerith!
Ideally, use Cloud for physical attacks and have Aerith focus on healing and magic attacks.
You’ll probably need to heal your partner as well.
Sephiroth also uses Errant Whispers to target you like in the previous phase.
Switch characters when this happens as your AI-controlled ally will continue moving to avoid getting hit.
In the meantime keep attacking with the other party member to get your ATB up.
While you could easily get behind him, he’s immune to all physical damage during this attack.
Target his wing and cast a spell to destroy it.
This has to either be an elemental spell or one of Aerith’s magic abilities.
During this, he sticks his sword Masamune into the ground, which is only weak to magic.
Take the chance to get in a few free hits to build up stagger.
When he recovers from being pressured, Sephiroth activates Wicked Argument, and he suddenly attacks much more aggressively.
Watch out again for Skewer and Jump attacks.
The latter causes whispers to burst from the ground nearby.
In this late phase, Sephiroth will also charge up his deadliest attack: Octoslash.
Strike him down though and he’s once again open to pressure and stagger.
No matter what, this attack will kill both of you.
Ideally, stash your powerful Synergy Abilities or Limit Breaks for this occasion, and avoid using them earlier.
Sephiroth rewards in Final Fantasy 7 Rebirth
Sephiroth is down!
There’s still part three of this remake trilogy to go, after all.
Finishing the fight will earn you 5625 EXP, 30 AP, and 2250 Gil.
it’s possible for you to then sit back and enjoy the ending to Final Fantasy 7 Rebirth.
Congratulations on completing the game!
